


Bonjour à tous
Page 27 sur 29 •  1 ... 15 ... 26, 27, 28, 29

 Restoration 2015
![]() par Jack Panzica Lun 23 Mar 2015 - 1:32
par Jack Panzica Lun 23 Mar 2015 - 1:32
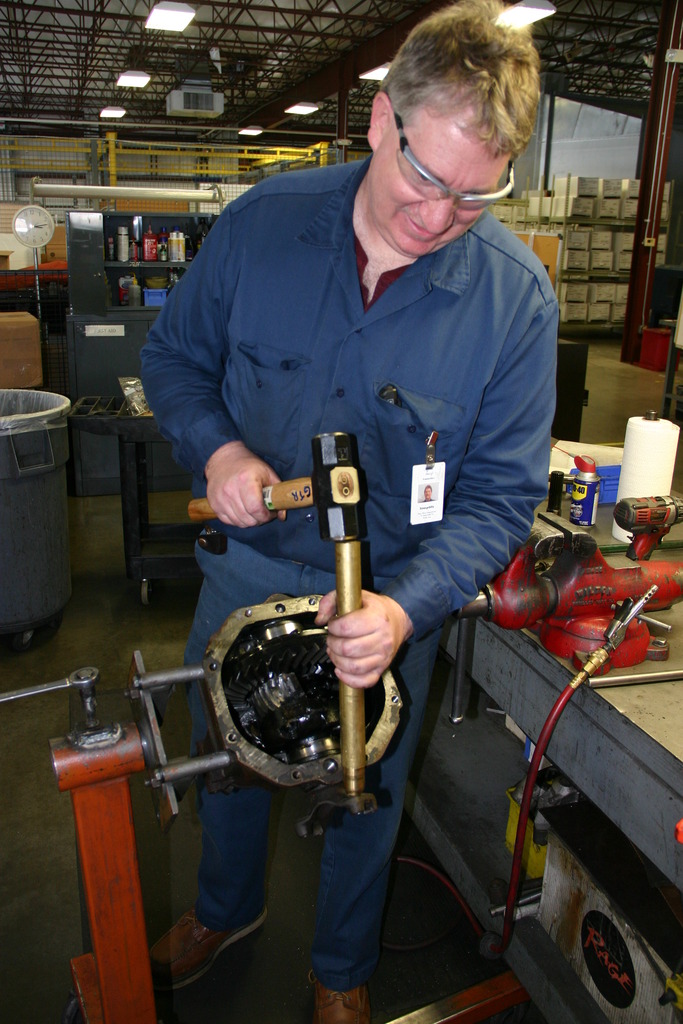
He did my steering box and now the rear.
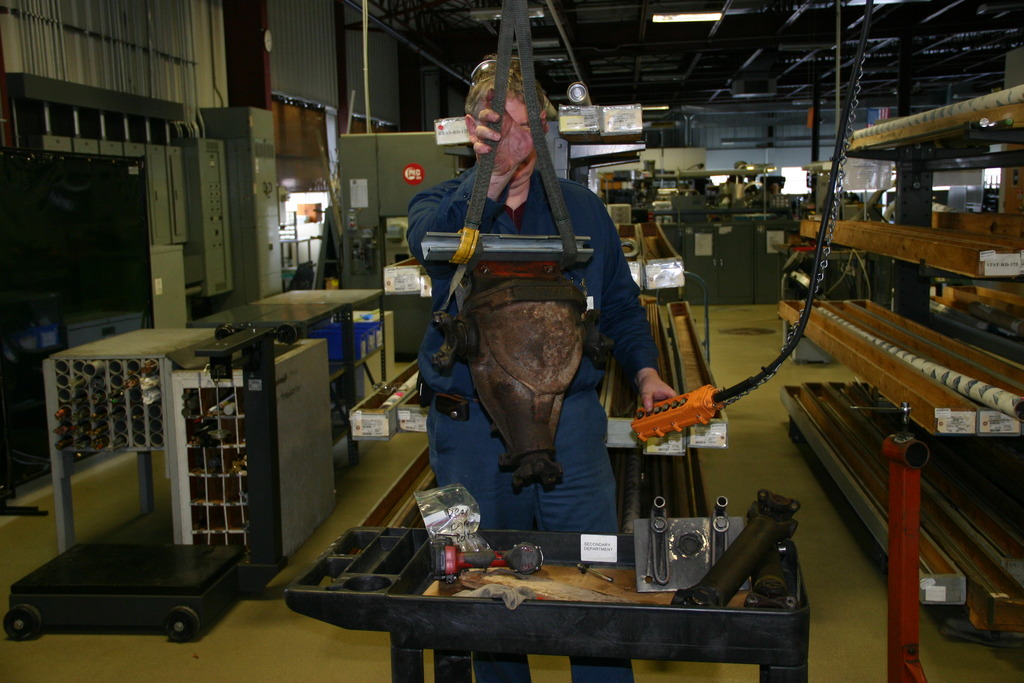
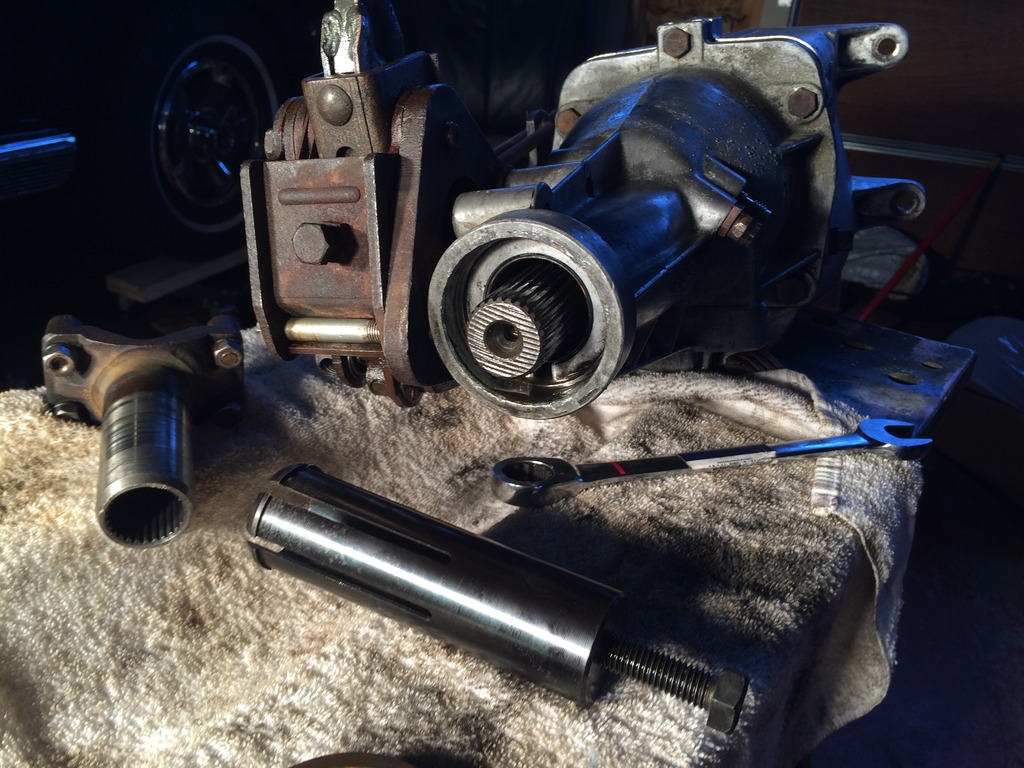
Here are the photos of Gary at work doing a preliminary inspection of my rear. As you know, it was a mess after blowing up a few months ago.
The posi unit would not come out even with the side yokes removed. Gary will use a case spreader later in week to spread the side walls of case so that the bearings and posi can be removed. We tried with a pry bar but could only get it half way out.
I will have follow up photos as Gary sends them to me next week.
The end result will be a rear that will go from 3:70 back to the original 3:36 that the car was born with.
The arrival
Proper mounting needed to work on rear
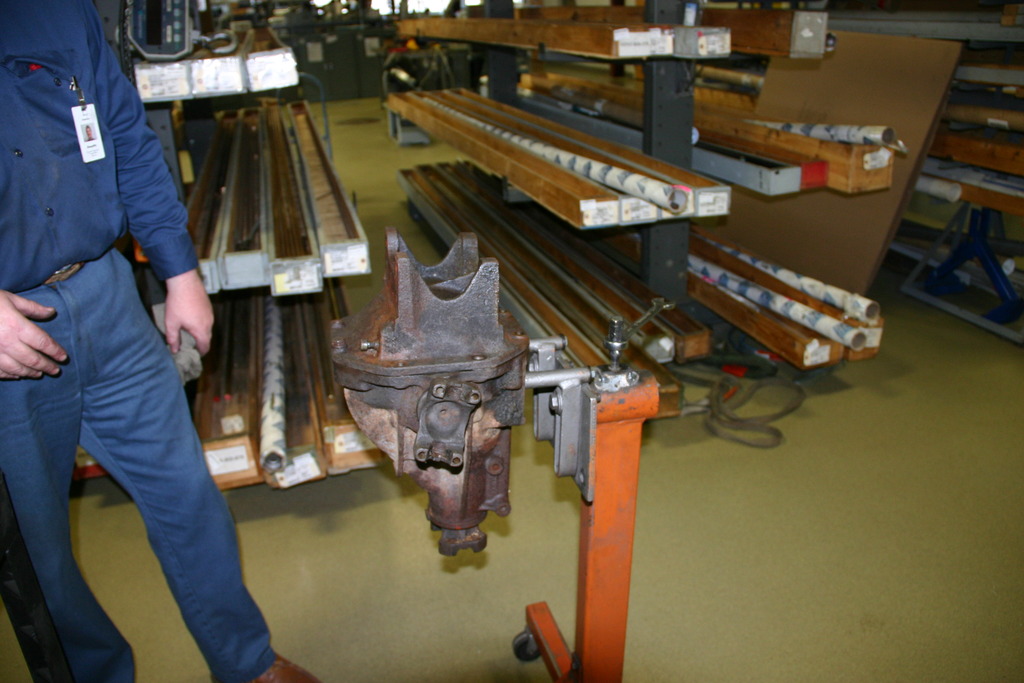
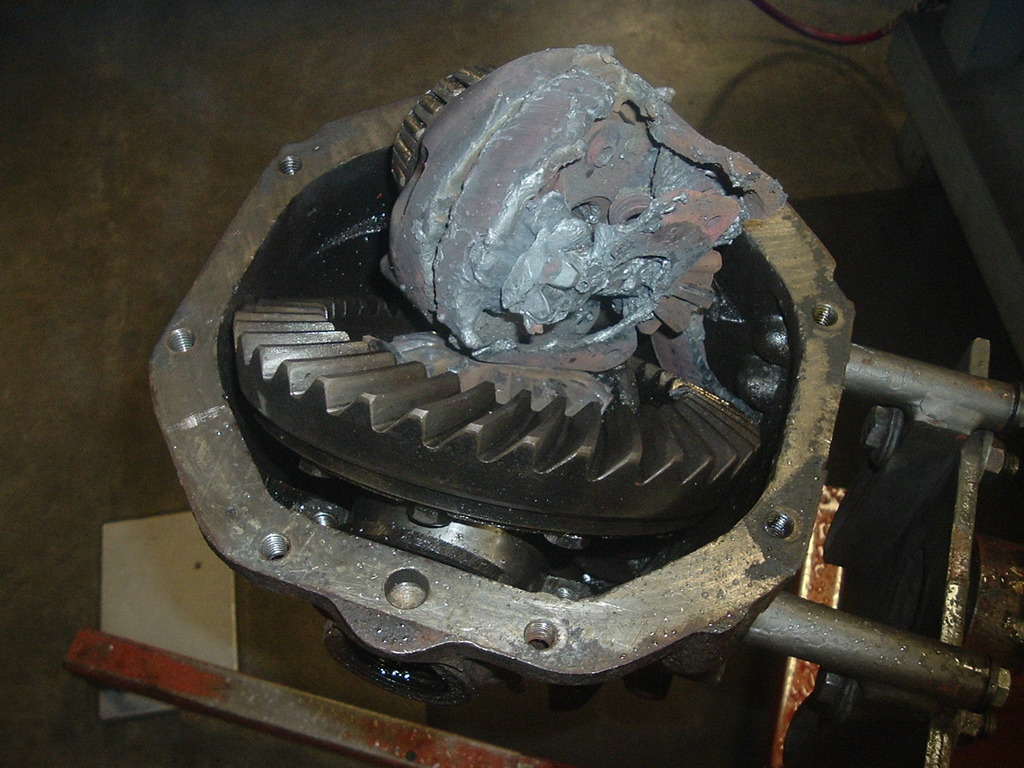
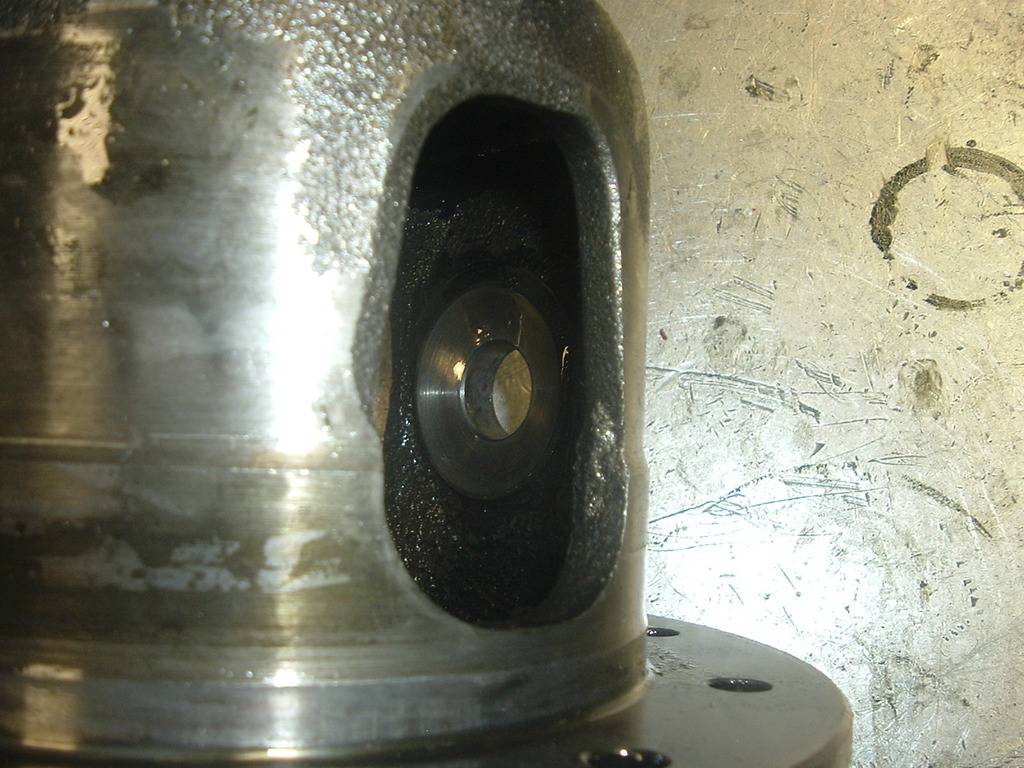
Cover is off and that look is not good !

You expect me to fix this ?

Oh my ! what do we have here ?

Need a big wrench to turn the unit to get at snap rings

Got them off after a bit of work
Needed a big hammer to get the side yokes to come out, usually they side right out but the case is a little twinkled
Side yokes removed

Jack Panzica- LT1

- Nombre de messages : 319
Age : 76
Localisation : Maine USA
Modele Vette : 1966 Glen Green Roadster L-79 350 HP
Date d'inscription : 27/02/2012


Reynel- Coup de Cœur C.P.

-
 Nombre de messages : 5641
Localisation : Corvette Land
Modele Vette : ZR-1 1992 / C6 LS3 Z51
Date d'inscription : 23/01/2012
Here is a real burn out
![]() par Jack Panzica Sam 28 Mar 2015 - 16:31
par Jack Panzica Sam 28 Mar 2015 - 16:31
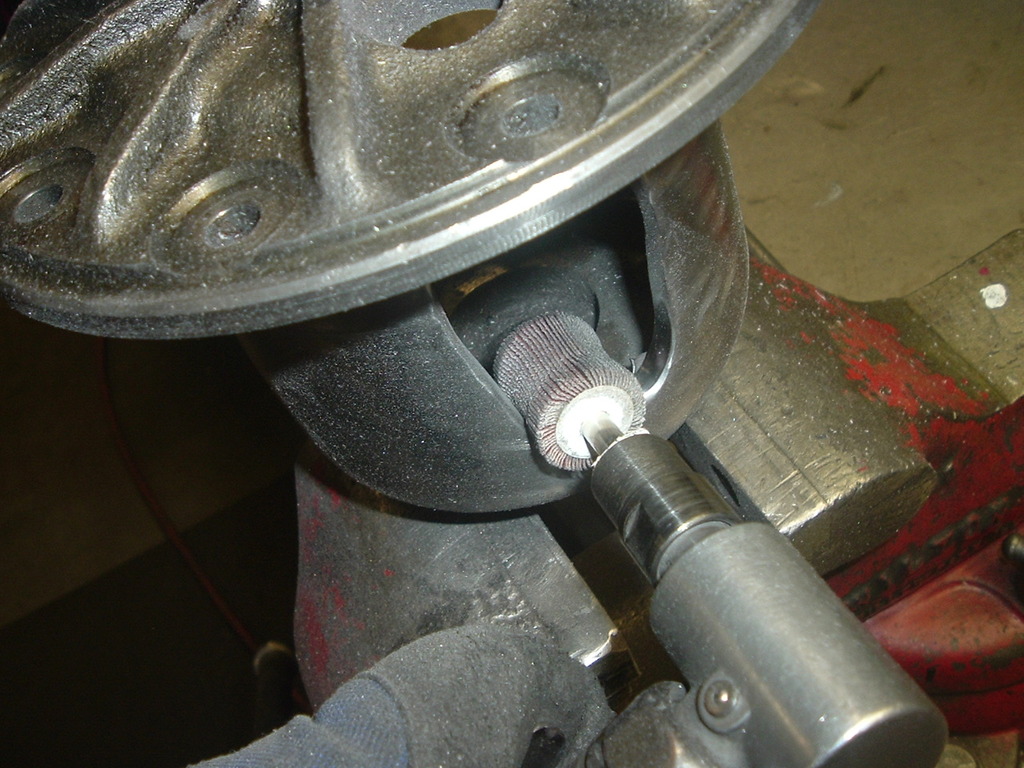
He took a torch to the posi to remove it , to see if the case would be usable to rebuild. It was not.....
Enjoy the pictures.....he will replace the whole rear end for me and then tune it.


Jack Panzica- LT1
- Nombre de messages : 319
Age : 76
Localisation : Maine USA
Modele Vette : 1966 Glen Green Roadster L-79 350 HP
Date d'inscription : 27/02/2012


Alec- Turbocharged

- Nombre de messages : 31597
Age : 76
Localisation : Île d''Oléron
Modele Vette : C5 2001 Callaway+B&B Bullet ,Sway bar C6 Z06 jantes C6
Date d'inscription : 22/03/2007
Information on c-2 c-3 differentails
![]() par Jack Panzica Dim 29 Mar 2015 - 22:39
par Jack Panzica Dim 29 Mar 2015 - 22:39
Ed Johnson , a NCRS member and friend has donated a 78 rear end to be used as base carrier and case for Gary to work on.
I hope this info helps some of the new and old members .
Hi Jack, Ed, Guys
Some information for you on Jack's diff issue and 63-79 vette diff's in general.
Jack had a 1968 complete differential in his '66 for the past 45 years. The '65-68's used the 1st design Eaton Posi case in place of the Dana posi used in 63-64. Keep in mind posi was optional until 1970 so there are some open differentials out there still. They were stronger then the Dana posi and I think equal to the Eaton 1st design.
The Eaton 1st design can be ID'd by looking at the case, they have what I call the "postage stamp" window in them. They were a parallel seam casting and this design was prone to cracking at the seam to large window opening. This casting are rough with sharp edges that are stress risers and with abuse or time the cracks form. Once a crack is started then it's a time bomb. Weld or drill repair does not work out well once a crack is there, the only solution is to replace the posi case with the better 2nd design Eaton case used from 1969 -1979 and still sold in the aftermarket today. The 2nd design can be ID'd again by the window, in this case a larger "tear-drop" window. These have a single staggered tooth seam and are much less prone to cracking but they still crack. When ever I build a diff I polish and tune the posi's to cut down on this from happening. I also have them cryo treated for HP applications.
In Jack's case the posi case developed a crack, who knows when, could have been in 1983 when Jack was burning rubber, could have been driving across the country, who knows. The only way you will know is to remove the diff and check it. However I have heard posi's getting ready to break by a clicking sound. I don't know if Jack heard that, I think he said he did when he came in last week but he would know better. My son heard it before his posi case broke in 1/2 on the street. Once the crack reached the cross shaft hole it was over. That is when I think it starts to click as play in the cross shaft and spider pinion gears increases. Then the gears will jam up and lock the posi and break. Jack's locked up and spun into the pinion "milling" it down in a second. Once the case broke it expanded inside the housing and really jammed up. It wrecked the RH axle and bearing and that is why I don't trust the housing. I have seen them break before but they usually shear and become loose parts inside the housing. Then when I open them up the parts fall out. Jack's was just the opposite. It was wedged so tight it was like having a case spreader on it and still wouldn't come out until I torched it out.
Have fun and drive your cars.....
Jack
Jack Panzica- LT1
- Nombre de messages : 319
Age : 76
Localisation : Maine USA
Modele Vette : 1966 Glen Green Roadster L-79 350 HP
Date d'inscription : 27/02/2012
Corvette Vagabond's car is 49 years old today!
![]() par Jack Panzica Mar 7 Avr 2015 - 13:24
par Jack Panzica Mar 7 Avr 2015 - 13:24
Not bad for a old sports car
Jack
Jack Panzica- LT1
- Nombre de messages : 319
Age : 76
Localisation : Maine USA
Modele Vette : 1966 Glen Green Roadster L-79 350 HP
Date d'inscription : 27/02/2012
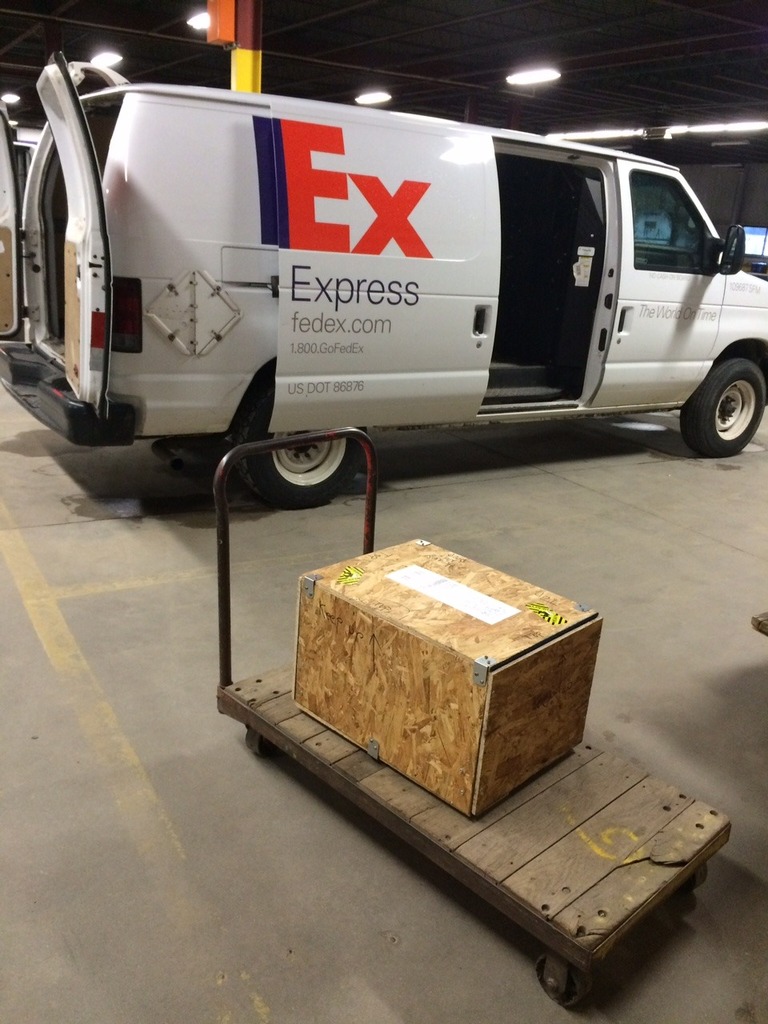
Just picked up my rear !
![]() par Jack Panzica Mer 8 Avr 2015 - 23:22
par Jack Panzica Mer 8 Avr 2015 - 23:22
I made a quick ride to Easton, MA , where a good friend , Ed Johnson owns a home town service and repair shop .
Ed had graciously donated a late seventies corvette differential to my car. It has a 3:70 in it, but I will have that changed (3:36) out by Gary Ramadei, of New Haven , CT , who is going to rebuild and tune it for me.
I will box it up and send it to him this week.
Here are few pictures of Ed and his good friend Bob, (owns a 63) who helped with the transfer. If you ever need mechanical work done just south of Boston, give Ed a call....508-238-9455
Ed & Bob in his shop

Here she is .....


Jack Panzica- LT1
- Nombre de messages : 319
Age : 76
Localisation : Maine USA
Modele Vette : 1966 Glen Green Roadster L-79 350 HP
Date d'inscription : 27/02/2012
A tall fish tail story ! Honey its Friday , fish for dinner
![]() par Jack Panzica Jeu 9 Avr 2015 - 13:02
par Jack Panzica Jeu 9 Avr 2015 - 13:02

Jack Panzica- LT1
- Nombre de messages : 319
Age : 76
Localisation : Maine USA
Modele Vette : 1966 Glen Green Roadster L-79 350 HP
Date d'inscription : 27/02/2012
Re: Bonjour à tous
![]() par Alec Jeu 9 Avr 2015 - 13:09
par Alec Jeu 9 Avr 2015 - 13:09
Alec- Turbocharged
- Nombre de messages : 31597
Age : 76
Localisation : Île d''Oléron
Modele Vette : C5 2001 Callaway+B&B Bullet ,Sway bar C6 Z06 jantes C6
Date d'inscription : 22/03/2007
Its has been 49 years since a Pro has touched my shafts..!
![]() par Jack Panzica Mar 21 Avr 2015 - 1:09
par Jack Panzica Mar 21 Avr 2015 - 1:09
This is a local shop that deals with a lot of construction equipment and truck shafts. Shops are getting harder to find now.

Look at the size of the shaft next to my little guys

Update on car restoration....yes...it seems like it is turning into a restoration from just a stuck transmission plug.
Ed Johnson had donated a 78 rear with the good Eaton Posi unit (it will be ) to me and I have just shipped it off to Gary Ramadei, who many know of for his rear end, TA and steering box rebuilding skills.
He is going to tune it, replace the clutches with metal ones, and put in 3:36 gears instead of the current 3;70. With my wide ratio Muncie , the car will be back to original gearing that I changed out in 1972 ish....
On the way to Gary Ramadei
When done, I will have replaced all rear suspension rubber bushings, strut rods , spring bushing, shaft balancing/joints, body mounts and bushings and maybe the throw out bearing ...mufflers and pipes...lets see...did I miss something.......
Jack Panzica- LT1
- Nombre de messages : 319
Age : 76
Localisation : Maine USA
Modele Vette : 1966 Glen Green Roadster L-79 350 HP
Date d'inscription : 27/02/2012
Corvette KOs Owner !
![]() par Jack Panzica Jeu 23 Avr 2015 - 15:18
par Jack Panzica Jeu 23 Avr 2015 - 15:18
I had fun taking out my Muncie , I should have ducked , wrench fell, I moved to fast and forgot that I had no head room....
But it is out.....took about 2 hours no real problems , just lowered engine , as I moved tranny straight back, then raised engine and tranny fell forward and out...
Will replace throw out bearing (65,000 miles) last four years, and rear seal and bearing, to go with new slip yoke.

Jack Panzica- LT1
- Nombre de messages : 319
Age : 76
Localisation : Maine USA
Modele Vette : 1966 Glen Green Roadster L-79 350 HP
Date d'inscription : 27/02/2012
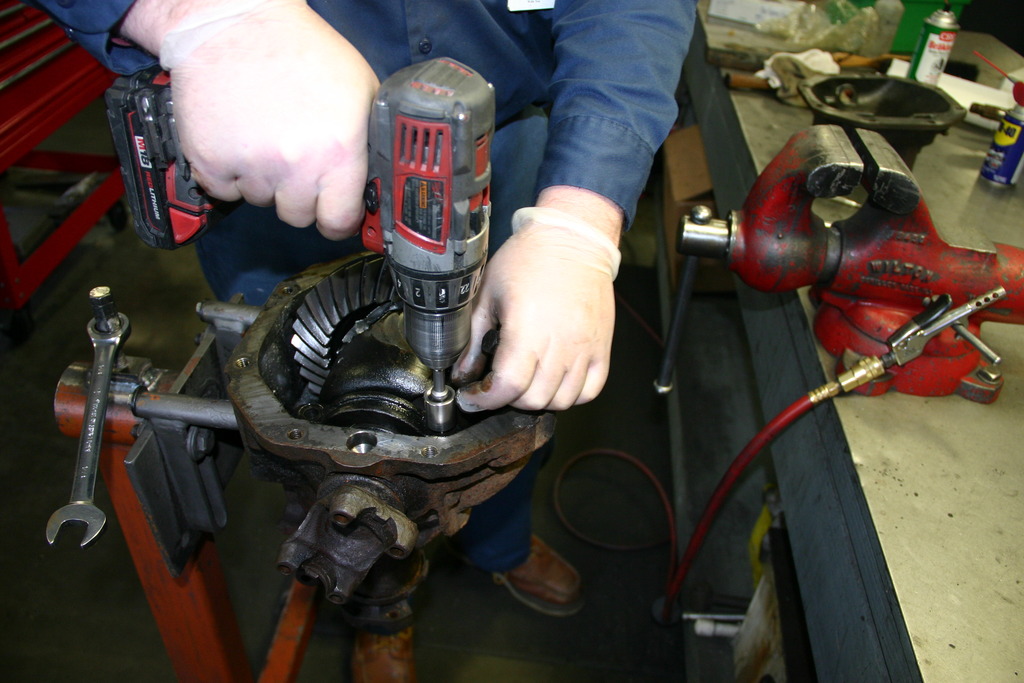
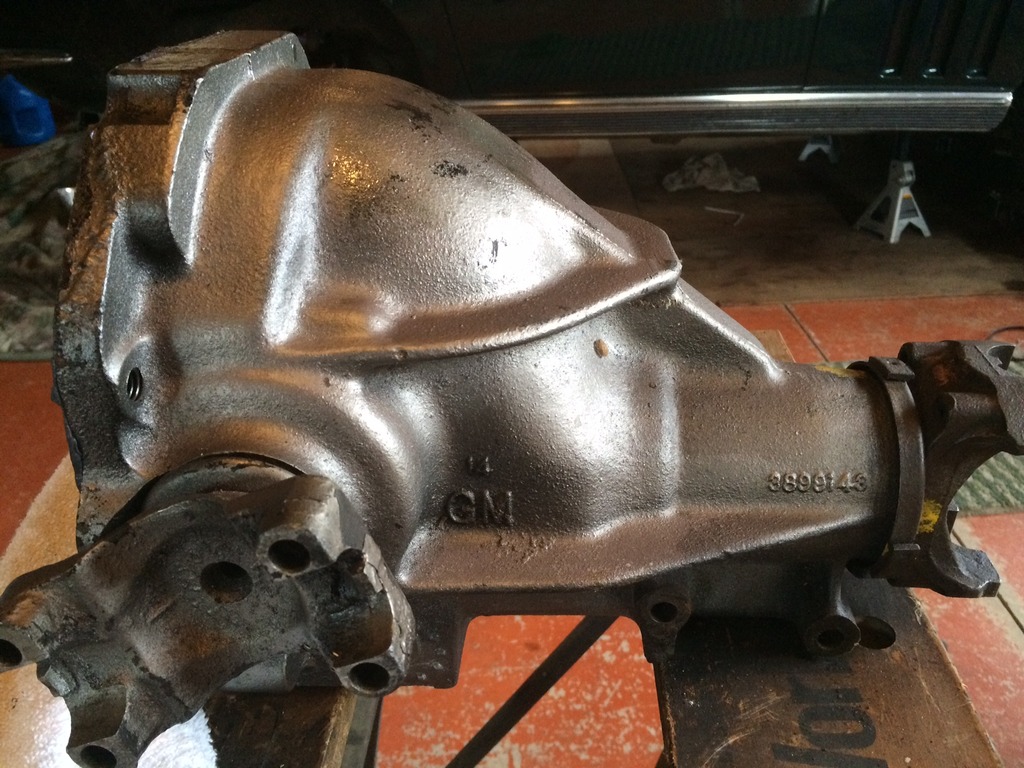
Rear End Rebuild
![]() par Jack Panzica Jeu 23 Avr 2015 - 16:11
par Jack Panzica Jeu 23 Avr 2015 - 16:11
Gary Ramadei is rebuilding the 78 rear end that Ed Johnson donated to the project. Here are some pictures of his inspection and comments.
"Looks like this came out of a 79 vette. The gear date is Aug 1978, maybe it made it into a later 78? Doesn't matter the 78 & 79's were ok but did have some areas that were weak. The clutches, ring gear bolts, and axles were bad and this one is typical as it has all those bad parts. They are not going to be reused though, I will use the best parts and that will make a difference. The axles had 065-070 endplay and were mushroomed over. These are just good for cores now. There were no broken snowflake clutches so that means this diff wasn't beat on much, otherwise they would be broken. The ring gear bolts used from 77-79 were junk. They stopped using lock washers and the bolts didn't have the shoulders like the older ones did. I will use ARP bolts, you can see them next to each other in the pictures."
d
Here are some pictures of rear inspection
Parts not being used.....

Disassemble rear


I will post next the pictures of the posi unit being polished
Jack Panzica- LT1
- Nombre de messages : 319
Age : 76
Localisation : Maine USA
Modele Vette : 1966 Glen Green Roadster L-79 350 HP
Date d'inscription : 27/02/2012
Posi Case being polished
![]() par Jack Panzica Jeu 23 Avr 2015 - 16:38
par Jack Panzica Jeu 23 Avr 2015 - 16:38


Same case after polishing


Jack Panzica- LT1
- Nombre de messages : 319
Age : 76
Localisation : Maine USA
Modele Vette : 1966 Glen Green Roadster L-79 350 HP
Date d'inscription : 27/02/2012
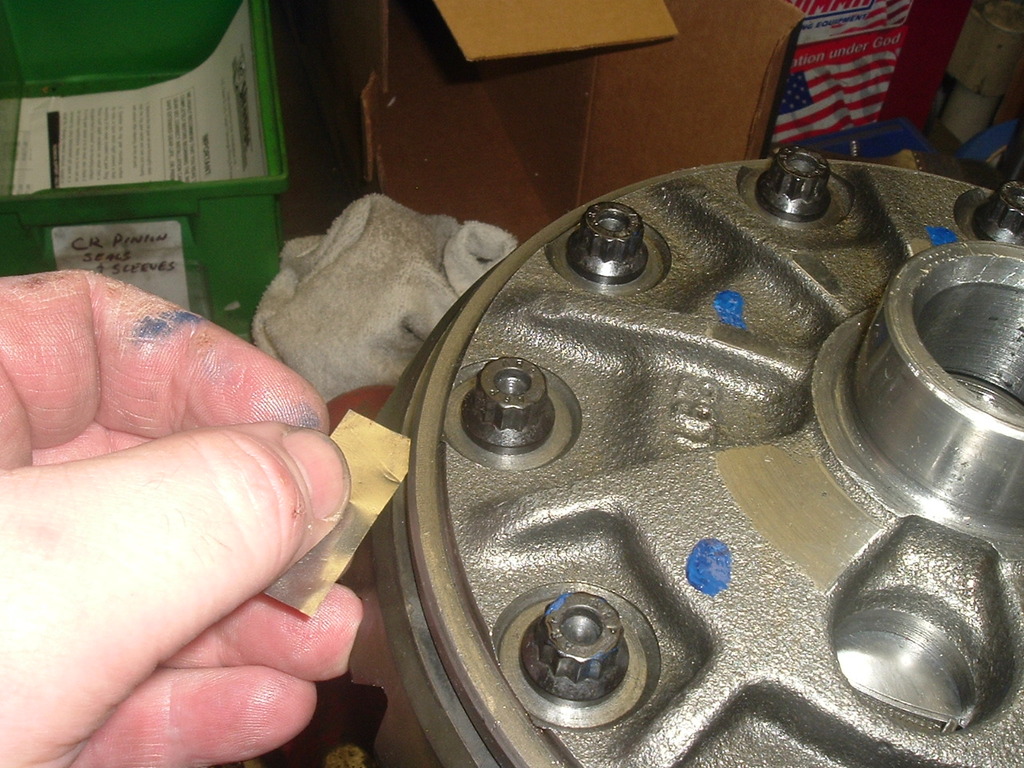
Posi Case Update Ring Bolts
![]() par Jack Panzica Ven 24 Avr 2015 - 17:53
par Jack Panzica Ven 24 Avr 2015 - 17:53
We are reworking a 78 Corvette Rear from 3:70 to 3:36 , plus tuning it.
Gary is doing the rebuild and here is a quote from him on bolts that attach the Ring gear.
"Here I countersunk the posi case ring gear holes. You see in picture#1 that the holes are square edged and the stock bolts work with that but not the ARP's. The ARP's have a larger radius under the head for more strength and have the shoulder on them like the old GM bolts did. Somewhere around 1977 they changed to the bolts that were in here before, shorter, no shoulder, and not loctited in place. Not good, many backed out in use sometimes within the factory warranty period. QC with the late 70's vettes wasn't as good as the earlier cars but that is probably the case with most lines of the period."
Stock bolts vs ARP's Stock on right
Before milling notice flat surface
Counter sink

Cut

Polish

Perfect fit

Jack Panzica- LT1
- Nombre de messages : 319
Age : 76
Localisation : Maine USA
Modele Vette : 1966 Glen Green Roadster L-79 350 HP
Date d'inscription : 27/02/2012
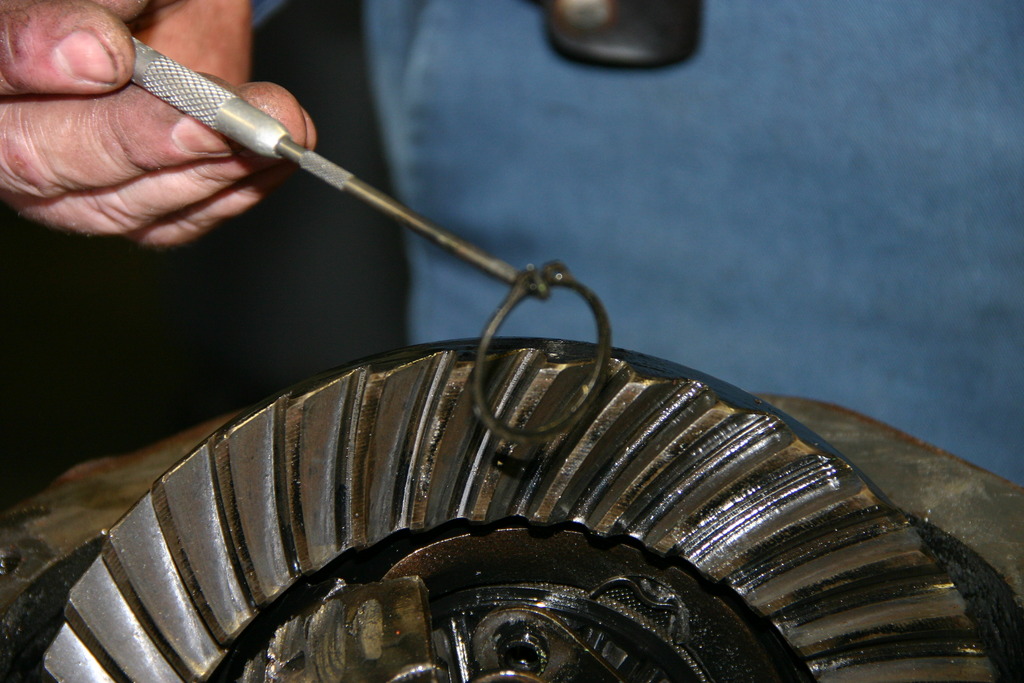
Posi Case being assembled
![]() par Jack Panzica Sam 25 Avr 2015 - 0:34
par Jack Panzica Sam 25 Avr 2015 - 0:34
Here is his commentary on the process.
Here I radiused the spider teeth to prepare to tune them. I used new solid steel clutches, new cross shaft, retainers, and washers. Next up the tuning process starts. Unlike a stock posi, where the spider lash is set between 002-008" and then the plates and springs are stuffed in there, I will set the posi up to a balanced, much more precise unit then any stock or rebuilt vette posi. where it is now I could just use the springs but it really works better to put the time and machine work in to tune them.
Pictures Parts laid out

Cross shaft and steel clutches


Radius Spider Teeth


Ready to Tune

Next series will be the tuning
Jack
Jack Panzica- LT1
- Nombre de messages : 319
Age : 76
Localisation : Maine USA
Modele Vette : 1966 Glen Green Roadster L-79 350 HP
Date d'inscription : 27/02/2012


Re: Bonjour à tous
![]() par Jack Panzica Sam 25 Avr 2015 - 0:42
par Jack Panzica Sam 25 Avr 2015 - 0:42
FRED51 a écrit:Very nice and fine job
bonjour, it is so pretty, hard to put in inside case with all that oil........
Jack
Jack Panzica- LT1
- Nombre de messages : 319
Age : 76
Localisation : Maine USA
Modele Vette : 1966 Glen Green Roadster L-79 350 HP
Date d'inscription : 27/02/2012
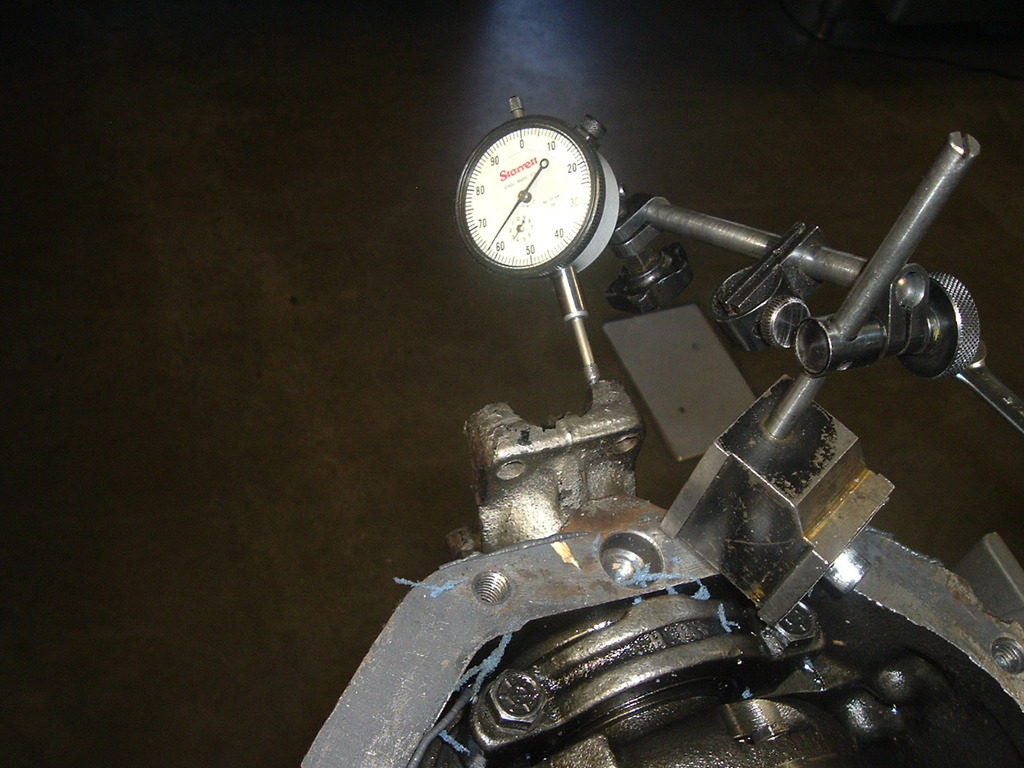
Tuning the Posi Unit
![]() par Jack Panzica Sam 25 Avr 2015 - 0:56
par Jack Panzica Sam 25 Avr 2015 - 0:56
"Here I started to tune the posi. While some think you just remove the springs and plates and bolt it together, there is much more to it. The process requires running in the new clutches to "seat" them. This will change the lash after about 50 rev's but I go at least 300 per side, CW & CCW. Then check it on the bench fixture and re-shim. The shims come in 005 increments so I grind them to within 001" to dial in the tune. The end result is a balance setup between both the Left & Right sides. The naysayers will tell you it will not work, yet Tom's has been building them like this for over 40 years for street, strip, and road race cars. You will have full posi action yet there won't be any hammering in the corners and there is less load on the clutches. All my vettes are setup like this and work great."
Video of process
Just click on picture for video
Jack Panzica- LT1
- Nombre de messages : 319
Age : 76
Localisation : Maine USA
Modele Vette : 1966 Glen Green Roadster L-79 350 HP
Date d'inscription : 27/02/2012
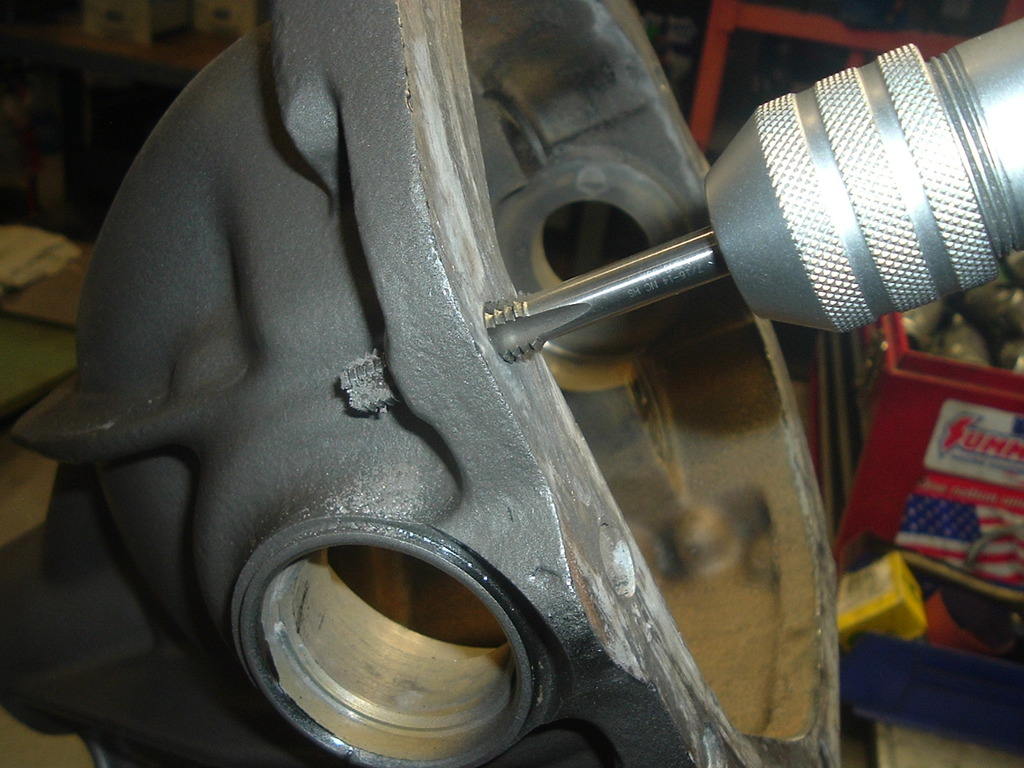
Preparing Case
![]() par Jack Panzica Dim 26 Avr 2015 - 18:06
par Jack Panzica Dim 26 Avr 2015 - 18:06
Continuing the rebuild, we are now preparing the case . It must be cleaned both inside and out. Here are comments from Gary on this procedure.
"Here I worked on the housing, cover and pinion yoke. I finished blasting them to bare iron. Now most places will just shoot a cheap top coat of paint and call it done. I never liked that since once the car is in use that paint isn't going to last as long as it should. So I blast the parts to bare iron. Then Etch them for 30 minutes, rinse, blow dry, flame dry, cool, POR15 and then when just right shoot the top coat to mix with the POR15 and harden together. I'm waiting for the POR15 to setup now to shoot the top coat. Then I'm going home to fire up my 72 vette for a weekend ride!
"
Blasting first

Etching

Flame Dry

POR 15 Base coat

Final Coat


Interior Case Prep Next
Jack Panzica- LT1
- Nombre de messages : 319
Age : 76
Localisation : Maine USA
Modele Vette : 1966 Glen Green Roadster L-79 350 HP
Date d'inscription : 27/02/2012
Installing the 3:36 Gears
![]() par Jack Panzica Dim 26 Avr 2015 - 18:26
par Jack Panzica Dim 26 Avr 2015 - 18:26
"Once I had the posi were I wanted it, I stoned the back of the new USA 336 ring gear and the posi flange. Then I cleaned the new ARP's in Acetone, same with the RG holes. I use alignment studs to keep the ring gear in place since it is a press fit on the case OD. I use #271 red on the ARP bolts, torque them and then check for full seating of the bolt and the ring gear. I'll let the Loctite set up at least 24 hours before applying any load to them."
Clean Bolts in Acetone

Tom's US Gear 3:36 to replace 3:70


Stone surfaces

Alignment Bolts

Torque Bolts


Check Fit
All Set Up

Jack Panzica- LT1
- Nombre de messages : 319
Age : 76
Localisation : Maine USA
Modele Vette : 1966 Glen Green Roadster L-79 350 HP
Date d'inscription : 27/02/2012
Preparing Interior of Case
![]() par Jack Panzica Dim 26 Avr 2015 - 19:07
par Jack Panzica Dim 26 Avr 2015 - 19:07
"Hi Jack
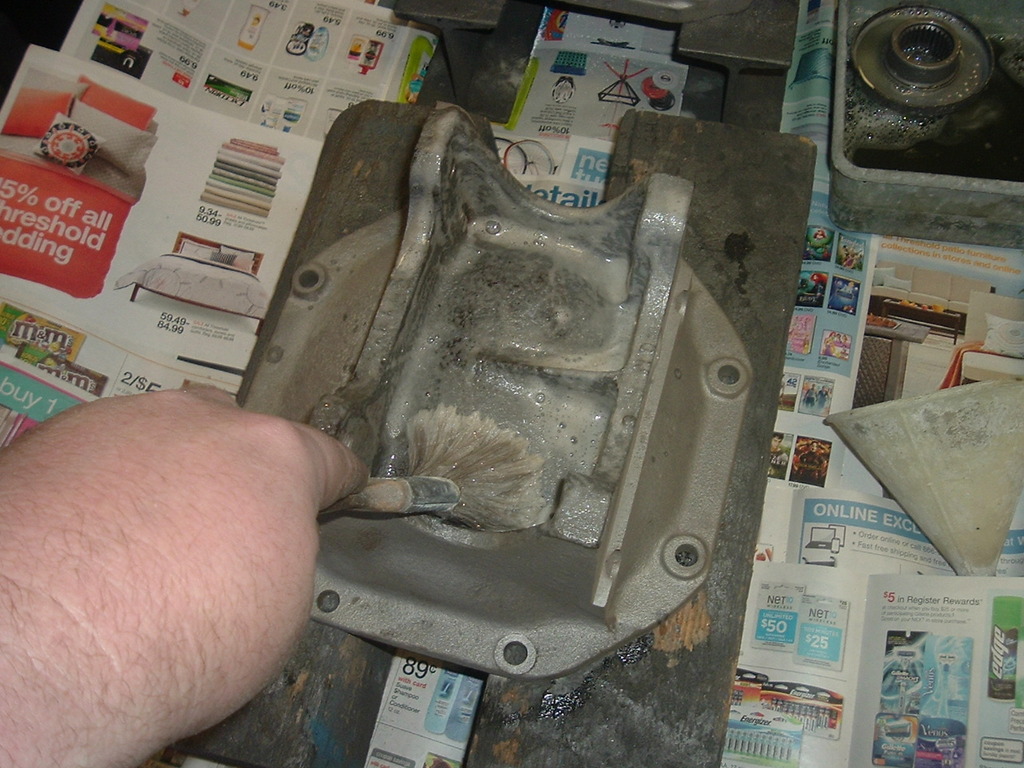
Here I final prepped the housing. You can see there in the ready pictures the inside didn't look so good after etching and rinsing. It was really only minor surface rust but I cleaned it up good with a wire wheel.
The holes were all chased. The pad holes were bottom tapped and countersunk, this means a bottom tap was used to cut new threads to the bottom of the holes. The factory used a starter or plug tap and the bottom threads don't always get a full tap. The bolt may not fully engage the threads so I know now the hole is fully threaded beyond the length of the bolt. The reason to countersink the holes is to cut the lead- in thread to prevent it from pulling when the bolt is torqued. The same process used on head bolt holes. All the oil passage were brush, washed, and blown clean with compressed air."
Rusting Before picture

Wire Bush


Chase holes

Radius Edges


Cleaning bores

Cleaned and ready to go


Jack Panzica- LT1
- Nombre de messages : 319
Age : 76
Localisation : Maine USA
Modele Vette : 1966 Glen Green Roadster L-79 350 HP
Date d'inscription : 27/02/2012
Putting in drain plug
![]() par Jack Panzica Dim 26 Avr 2015 - 19:22
par Jack Panzica Dim 26 Avr 2015 - 19:22
"Here I tapped the drain plug hole and fit the plug. With new gears you will have to heat cycle them the first 10 drives you make. Drive 25-30 minutes, no racing, get the diff hot. Stop and let it cool at least 1 hour. At 500 miles you drain the oil and add fresh. With this drain plug it will be a 10 minute job, just jack up the RR of the car , pull the wheel off, put your drain pan under the plug, remove the fill plug with a long extension and 5/8" 8 pt socket and drain the oil. Clean off the fines on the plug, put a little #2 permatex on the plug and snug it up. Add posi additive and pump in Lucas 85-140 gear oil, should take just under 2 qts. Seal plug and install- done."
Tap hole

Fit Magnetic Plug


Installed

Jack Panzica- LT1
- Nombre de messages : 319
Age : 76
Localisation : Maine USA
Modele Vette : 1966 Glen Green Roadster L-79 350 HP
Date d'inscription : 27/02/2012
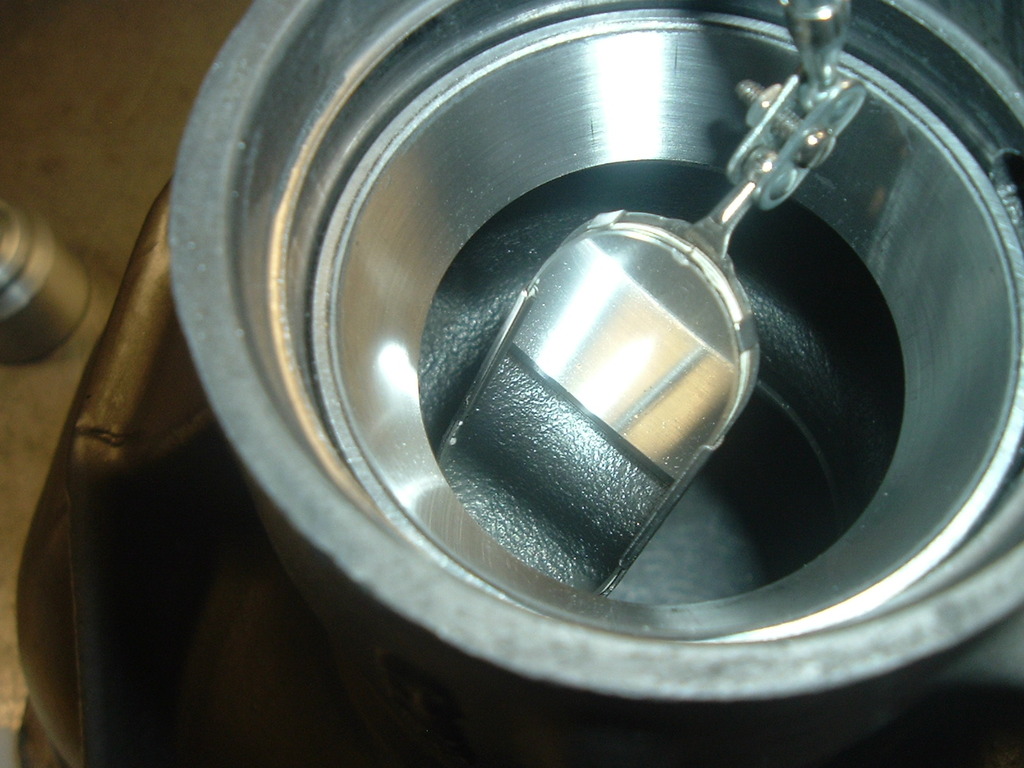
Bearing Install
![]() par Jack Panzica Dim 26 Avr 2015 - 20:03
par Jack Panzica Dim 26 Avr 2015 - 20:03
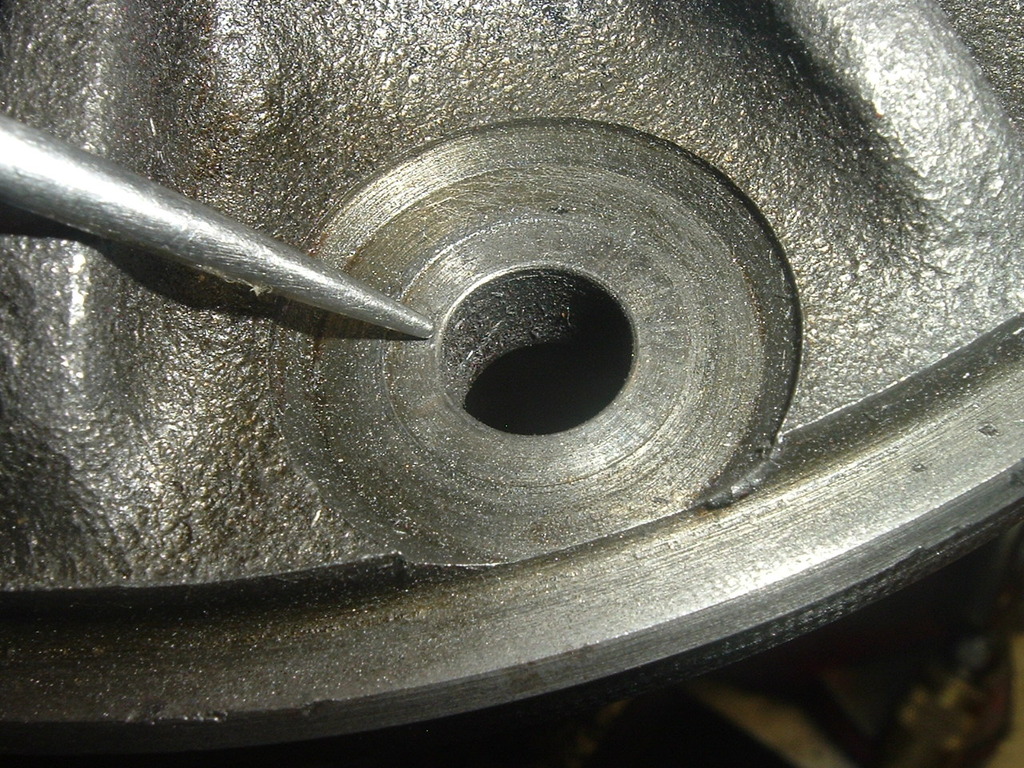
"Here I installed the new USA Timken pinion races in the housing"


Checking work
Jack Panzica- LT1
- Nombre de messages : 319
Age : 76
Localisation : Maine USA
Modele Vette : 1966 Glen Green Roadster L-79 350 HP
Date d'inscription : 27/02/2012
Re: Bonjour à tous
![]() par titus50 Dim 26 Avr 2015 - 21:27
par titus50 Dim 26 Avr 2015 - 21:27
great job, really entirely renovated this differential
good luck
Michel
titus50- Turbocharged
- Nombre de messages : 8474
Age : 67
Localisation : Basse Normandie,Manche 50
Modele Vette : C5 50th bvm6 !!! de retour après une pause de 7 mois !!cool
Date d'inscription : 22/08/2011
Removing the seal and rear bearing of tranmission
![]() par Jack Panzica Mar 5 Mai 2015 - 2:11
par Jack Panzica Mar 5 Mai 2015 - 2:11
My old slip yoke had 300,000 miles on it and it shows it.

My new slip yoke and balanced drive shaft

The tool to extract the rear bearing , with seal removed

Close up of tool
Rear Bearing , the tool slides in just like a yoke

I use a hose clamp to compress flanges of tool , edges grab bearing

Use wrench to extract bearing , bolt pushes on tail shaft , pulling bearing

Bearing pulled out


Can be done with tranny in car and not taken apart

Jack Panzica- LT1
- Nombre de messages : 319
Age : 76
Localisation : Maine USA
Modele Vette : 1966 Glen Green Roadster L-79 350 HP
Date d'inscription : 27/02/2012
Page 27 sur 29 • 1 ... 15 ... 26, 27, 28, 29

 Sujets similaires
» Bonjour a tous
» Bonjour à tous
» Bonjour à tous ...
» bonjour à tous
|
|
|